
More actions
Admornstein (talk | contribs) No edit summary |
Admornstein (talk | contribs) |
||
| (10 intermediate revisions by the same user not shown) | |||
| Line 1: | Line 1: | ||
<templatestyles src="Template:Stats/styles.css" /> | <templatestyles src="Template:Stats/styles.css" /> | ||
<templatestyles src="Template:QuickSummary/styles.css" /> | <templatestyles src="Template:QuickSummary/styles.css" /> | ||
== <span class="luna-heading gold">A | == <span class="luna-heading gold">A true expansion on the original</span> == | ||
<div style="float:right; margin:0 0 10px 20px;"> | |||
<youtube>www.youtube.com/watch?v=guppqp7m7cQ</youtube> | |||
</div> | |||
<div class="luna-section gold"> | <div class="luna-section gold"> | ||
The Combat is the heart of Luna Obscura, it is designed from the start to be a strong system where players interact with the world in a much more active way. | |||
Not only the tools players have are much more expanded vs vanilla RO, the monsters will also fight back and give you a hard time if you are not prepared for it. | |||
Fight mechanics, monster patterns, racial variations and special situations will test everything you think you know about RO. | |||
Not only that, but jobs have multiple tools, with their own combo counters, mechanics, stacks and so much more. | |||
Players are expected to engage with the combat for most of their experience, and as such, its the area where the game is at its best. gone are the days of one shotting huge waves of monsters for ultra low drop rates. | |||
</div> | |||
---- | ---- | ||
== <span | == <span class="luna-heading cyan">Essentials: Parry and Quickstep</span> == | ||
< | <div class="luna-section cyan"> | ||
=== <span style="color:#f2c37d;"> | |||
Every job in the game has access to <span style="color:#f2c37d;">Parry and Quickstep</span>. These two skills form the bread and butter of combat. | |||
Since Luna Obscura has no Hit/Flee, every hit will always connect, but you have tools to negate every single hit taken. Both skills also have a considerable lag tolerance to make it usable by any player. | |||
There are enemies in the Garden of Blades called Parry Trainer and Quickstep Trainer specifically prepared to teach you how to properly use these skills, their cards also are nice rewards for it. | |||
=== <span style="color:#f2c37d;">Quickstep</span> === | |||
<hr style="height:1px; background:#f2c37d; border:none;" /> | <hr style="height:1px; background:#f2c37d; border:none;" /> | ||
<div style="float:right; margin:0 0 10px 20px; width:400px;"> | |||
[[File:quickstepgif.gif|right|link=|class=nostyle nozoom]] | |||
</div> | |||
Quickstep will dash your character a few cells towards the cursor direction, no matter the distance of the cell you target. | |||
* The hunter becomes invincible for a short window, negating any damage taken while its active. | |||
* If the player mistimes the quickstep, it will receive glancing damage (halved damage). | |||
* Most skills can be avoided with Quickstep, this includes physical or magic, ground targeted or directly targeted skills. | |||
* The invincibility and glancing evasion window can be increased with higher stats. | |||
Luna Obscura was designed in a way where players are REQUIRED to properly use quickstep. This skill is considered essential and is learned very early on. | |||
Astral jobs have access to Lv2 Quickstep, which grants a slightly longer range and evasion window. | |||
Finally, equipping Quickstep [[Signets]] or other items can grant unique effects, including generating resources, improving movement speed or straight up teleporting. | |||
=== <span style="color:#f2c37d;">Parry</span> === | |||
<hr style="height:1px; background:#f2c37d; border:none;" /> | |||
<div style="float:right; margin:0 0 10px 20px; width:400px;"> | <div style="float:right; margin:0 0 10px 20px; width:400px;"> | ||
[[File: | [[File:parrygif.gif|right|link=|class=nostyle nozoom]] | ||
</div> | </div> | ||
Parry is the higher risk defensive tool available to all hunters, it allows you to counter a single normal-attack from enemies. | |||
* | * The hunter will take a countering stance when used, a cast bar will show the parry window. | ||
* | * While the cast bar is displayed, taking any normal attacks will negate the hit and counter attack with a guaranteed critical hit. | ||
* | * When parry is successful, it heals partial HP. | ||
* | * Parry does not negate skills, instead only halving their damage. | ||
* Parry has no range restrictions and can be used against ranged enemies without issues. | |||
Parry also comes with 2 mechanics: | |||
=== <span style="color:#f2c37d;"> | * Parrying an enemy before they start the attack will activate a regular parry. | ||
* Parrying after an enemy begins an attack, but before the attack lands will activate a perfect parry. Perfect parries refund the SP cost. | |||
Like Quickstep, parry is a core skill that needs to be learned to be used effectively to negate strong hits or extend your permanence in fights. | |||
Umbral jobs have access to Lv2 Parry, which grants a slightly longer window and higher damage and HP regain. | |||
Finally, equipping Parry [[Signets]] or other items can grant unique effects, including AoE effects, multiple hits, or negating multiple attacks at once. | |||
</div> | |||
---- | |||
== <span class="luna-heading crimson">Other Core Skills</span> == | |||
<div class="luna-section crimson"> | |||
The arsenal of skills for hunters also includes other notable skills, not only counting the job exclusive ones, we have skills for all hunters. | |||
=== <span style="color:#f2c37d;">Healing</span> === | |||
<hr style="height:1px; background:#f2c37d; border:none;" /> | <hr style="height:1px; background:#f2c37d; border:none;" /> | ||
<div style="float:right; margin:0 0 10px 20px; width:400px;"> | |||
</div> | |||
Healing is part of every hunter's kit, you have access to the free to refill [[Consumables]]: The Vials. Which can be customized and refilled for free. | |||
* | * Astral Hunters have access to <span style="color:#f2c37d;">Solar Heal</span>, which will heal a considerable amount of HP of a target ally. | ||
* | * Umbral Hunters have access to <span style="color:#f2c37d;">Lunar Heal</span>, which will heal a targeted ally over time, but with a higher amount. | ||
* | * Correctly using the heal skills will also be essential in properly surviving. Signets can also change the behavior of those skills. | ||
=== <span style="color:#f2c37d;"> | === <span style="color:#f2c37d;">Other Skills</span> === | ||
<hr style="height:1px; background:#f2c37d; border:none;" /> | <hr style="height:1px; background:#f2c37d; border:none;" /> | ||
* | * <span style="color:#f2c37d;">Area Loot</span> will manually pick-up every item on the ground, you can also just click an item and it automatically picks up everything around you. | ||
* | * <span style="color:#f2c37d;">Dash</span> will increase your move speed considerably when out of combat, for easier map traversal. | ||
* | * <span style="color:#f2c37d;">Backslide</span> is another evasive tool to quickly move out of danger or reposition, with its own glancing evasion window. | ||
* | * <span style="color:#f2c37d;">Sense</span> shows detailed information about monsters and their loot, they also show the monster stats and behavior expected from them. | ||
* <span style="color:#f2c37d;">Return</span> Return is learned on the first job change. It allows you to return to your save point, Nocturne or the Cathedral of Blades at anytime. | |||
While the skills above cover the majority of it, you can also check out the visual guide at the top of the page. | |||
</div> | </div> | ||
---- | ---- | ||
== <span class="luna-heading orange">Job Mechanics</span> == | |||
<div class="luna-section orange"> | |||
[[File:skillcombo.jpg|thumb|150px|Border|Click to Expand - Skill Combo Example]] | |||
Jobs in Luna Obscura have unique mechanics to them. Here we will cover some of the basics and provide some advanced examples. | |||
While there are many variations, they will not overwhelm players in most cases, as jobs may have some mechanics here and there, but never all of them at once. | |||
=== <span style="color:#f2c37d;">Ready Status and Combos</span> === | |||
<hr style="height:1px; background:#f2c37d; border:none;" /> | |||
<div style="float:right; margin:0 0 10px 20px; width:400px;"> | |||
</div> | </div> | ||
[[File:combogif.gif|right|link=|class=nostyle nozoom]] | |||
Combo Ready, Stab Ready, Cast Ready and so many more... all indicate that a follow-up of skills can be used for greater effect. | |||
* Usually a starter skill grants a given Ready state. | |||
* Other skills consume those states, or are just boosted by it considerably, creating a 1-2-3 skill flow. | |||
* In specific cases, using a given finisher or condition will cause guaranteed critical hits or special effects to happen. | |||
Ready states have their own signets, with extra damage effects, durations and such. Ready states are usually consumed when their conditions are satisfied (Stab Ready being an exception). | |||
---- | ---- | ||
=== <span style="color:#f2c37d;">Gauges and Stacks</span> === | |||
<hr style="height:1px; background:#f2c37d; border:none;" /> | |||
<div style="float:right; margin:0 0 10px 20px; width:400px;"> | |||
</div> | |||
While the Ready status is the most common one, others may also appear sometimes: | |||
< | * <span style="color:#f2c37d;">Orbits</span> are counters that surround the player and indicate a given resource. | ||
* <span style="color:#f2c37d;">Stacks</span> are gained and quickly lost or spent for boosting other skills. | |||
<span style=" | * <span style="color:#f2c37d;">Counters</span> are anything that counts hits or indicates a flowing action. | ||
<span style=" | * <span style="color:#f2c37d;">Gauges</span> are direct indicators of fighting and building up a resource to be spent. | ||
<span style="color:#ff66ff;">Details for all of the above and some more can be seen on the gifs below. You can hover the gifs to check the mechanic being presented in detail on the tipbox.</span> | |||
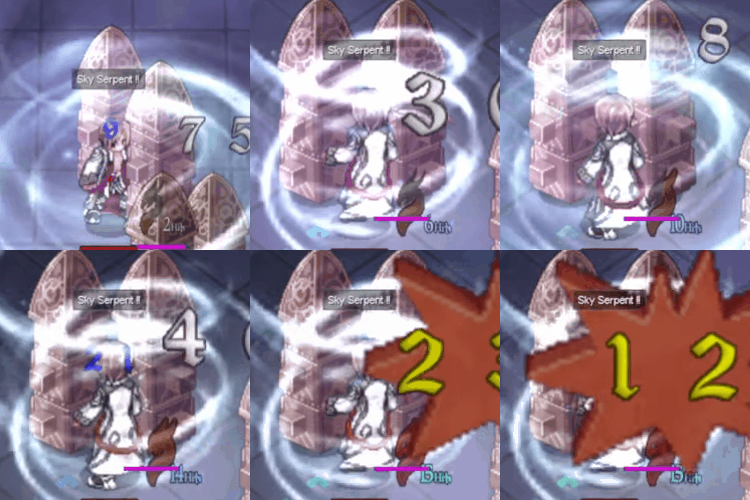
[[File:Leviathandemo.gif|link=|class=nostyle nozoom| Leviathan building up the Serpent Gauge to by chaining kicks together.]] [[File:Anubisdemo.gif|link=|class=nostyle nozoom| Anubis stacking buffs to proc autocasts and get spectral stacks quickly activating chain hits.]] [[File:Fenrirdemo.gif|link=|class=nostyle nozoom| Fenrir auto-attacking to build up ASPD and Dreadwolf Speed, then chaining skills without pause on attacks.]] [[File:Dullahandemo.gif|link=|class=nostyle nozoom| Dullahan building spectroblades with a basic combo, then spending those for a strong AoE skill.]] | |||
[[File:Valravndemo.gif|link=|class=nostyle nozoom| Valravn Stacks being bult up with Noctwist for heavier damage and activating other skills.]] [[File:Sirendemo.gif|link=|class=nostyle nozoom| Siren setting up an AoE on the ground that deals damage to enemies and heals allies, spending stacks with Grand Finale and playing a defensive song after.]] [[File:Phoenixdemo.gif|link=|class=nostyle nozoom| Phoenix taking damage and countering enemies with fire, and using the Emberwing bird to devour enemies and slave them to fight in their place.]] | |||
| | |||
| | |||
| | |||
| | |||
| | |||
| | |||
</div> | </div> | ||
---- | ---- | ||
== <span class="luna-heading purple">Changing Stances [[File:stancemode.png|link=|class=nostyle nozoom]]</span> == | |||
<div class="luna-section purple"> | |||
Stances are an extra system in Luna Obscura. Players can change their current combat priority on the fly by clicking the icon beside the Minimap. | |||
Clicking the button will cycle the player through the 3 stances, or turn it off. | |||
* <span style="color:#0000ff;">Caster Stance</span> Displays the cast range of skills and size of AoEs. Turns off auto attacks, targetting will prioritize enemies, reduces accidental movement clicks. Focuses on skill usage and precision. | |||
< | * <span style="color:#ff0000;">Warrior Stance</span> Specific follow-up skills can be used without targetting the enemy for the next one, similar to RO's Monk combos, but with more flexibility. Note that you cannot pause combos with this mode active. | ||
* <span style="color:#ffff00;">Cleric Stance</span> Healing, Drains, Leeches, Recovery and all else for both HP and SP will be displayed anytime it happens, shows the most information possible. By default, some healing does not show up in Luna Obscura to avoid clutter. | |||
You can also turn off all damage display on the Equipment window's 4th tab, or change its fonts/direction of display. | |||
</div> | |||
---- | |||
== <span class="luna-heading green">What about monsters?</span> == | |||
=== <span style="color:# | <div class="luna-section green"> | ||
[[File:sensedetails.jpg|right|link=|class=nostyle nozoom]] | |||
=== <span style="color:#f2c37d;">Sense</span> === | |||
<hr style="height:1px; background:#f2c37d; border:none;" /> | |||
<div style="float:right; margin:0 0 10px 20px; width:400px;"> | |||
</div> | |||
Shown on the image to the side, it shows all relevant aspects of a monster when used. Items and their drop rates are shown with clickable links for details so you can target farm what you prefer. | |||
Monster stats in Luna Obscura are revamped to show the risks and effectiveness of skills they use and what to expect. Such as: | |||
* A higher Breaker value on a monster indicates they may use more debuffs, or their debuffs are stronger. | |||
* | * A monster with higher speed may use evasive skills and tactics, or attack you very fast. | ||
* | * The detailed information at the end will let you know exactly what you are fighting, such as a "Large Fire Construct" or "Medium Dark Human". | ||
* | * Monsters will also have different AI priorities depending on what they are. Constructs may follow strict patterns and skills, Plagues may improvise and Mythics can use impressive skills for example. | ||
=== <span style="color:# | === <span style="color:#f2c37d;">Monster Types</span> === | ||
<hr style="height:1px; background:#f2c37d; border:none;" /> | |||
<div style="float:right; margin:0 0 10px 20px; width:400px;"> | |||
</div> | |||
The key information on fighting is that enemies are not just targets you take down and move on, they will actively do their best to kill you too and can be risky even when they look harmless. Nobody expects a cursed human to randomly get back up as a zombie and keep attacking you right when you ran out of SP. | |||
<div style="line-height:1.6; font-size:15px;"> | |||
<span style="color:#aaaaff; font-weight:bold; font-size:16px;">Construct</span><br /> | |||
– They will employ direct combat tactics aiming to take you down with direct combat. They have unique movement interactions and may surprise you with their power and arsenal.<br /> | |||
<span style="color:#ffffff;">Constructs take <span style="color:#66ccff;">5% extra damage from Wind Element</span></span><br /><br /> | |||
<span style="color:#ff6666; font-weight:bold; font-size:16px;">Undead</span><br /> | |||
– These use simple and effective combat methods, mostly focused on either cursing their opponent in order to make them suffer or draining their power or health.<br /> | |||
<span style="color:#ffffff;">Undeads take <span style="color:#ff5555;">5% extra damage from Fire Element</span></span><br /><br /> | |||
<span style="color:#ffcc66; font-weight:bold; font-size:16px;">Human</span><br /> | |||
– The Humans fight with tools and tactics similar to hunters, but in a crude, unrefined way. Humans will have smart and reactive battle tactics to push combat to a high risk situation.<br /> | |||
<span style="color:#ffffff;">Humans take <span style="color:#cc9933;">5% extra damage from Earth Element</span></span><br /><br /> | |||
<span style="color:#cc88ff; font-weight:bold; font-size:16px;">Spirit</span><br /> | |||
– They are supernatural beings that can cause problems to the living, they never abandoned the world after their death. They are prone to avoiding defeat or reversing a difficult situation in a pinch.<br /> | |||
<span style="color:#ffffff;">Spirits take <span style="color:#9966ff;">5% extra damage from Ghost Element</span></span><br /><br /> | |||
<span style="color:#88ff88; font-weight:bold; font-size:16px;">Plague</span><br /> | |||
– Plagues such as rats and insects that devour the land and ravage anywhere they go. They are prone to high density or group tactics, and provide risk in numbers, and must be cleansed.<br /> | |||
<span style="color:#ffffff;">Plague takes <span style="color:#66ddff;">5% extra damage from Water Element</span></span><br /><br /> | |||
<span style="color:#ffaa77; font-weight:bold; font-size:16px;">Beast</span><br /> | |||
– Transformed monsters or ferocious nature, the Beast bring the risk of a good hunt, being the most numerous around the land, they are a constant challenge for any hunter who is not prepared.<br /> | |||
<span style="color:#ffffff;">Beasts take <span style="color:#dddddd;">5% extra damage from Neutral Element</span></span><br /><br /> | |||
<span style="color:#dd4444; font-weight:bold; font-size:16px;">Demon</span><br /> | |||
– Demons take advantage of the weak and desperate during trying times, they are strong, imponent figures that trick, lie and manipulate people... or just slaughter them and move on.<br /> | |||
<span style="color:#ffffff;">Demons take <span style="color:#ffffcc;">5% extra damage from Holy Element</span></span><br /><br /> | |||
<span style="color:#ffbbff; font-weight:bold; font-size:16px;">Mythic</span><br /> | |||
– Magical creatures from folklore, dragons, chimeras, gryphons, sea serpents and other large monsters that come from supernatural, but not spiritual paths.<br /> | |||
<span style="color:#ffffff;">Mythic takes <span style="color:#9933cc;">5% extra damage from Dark Element</span></span><br /><br /> | |||
<span style="color:#888888; font-weight:bold; font-size:16px;">Cosmic</span><br /> | |||
– Creatures who cannot be fully comprehended, coming from another world or dimension, they can drive hunters insane or bring fear anywhere they come. Usually bosses or high-notoriety monsters.<br /> | |||
<span style="color:#ffffff;">Cosmic takes <span style="color:#cccccc;">equal damage from any element</span></span><br /><br /> | |||
<span style="color:#990000; font-weight:bold; font-size:16px;">Nightmare</span><br /> | |||
– Unspeakable Horror. Born from the depths of the darkness of the human mind and heart.<br /> | |||
<span style="color:#ffffff;">Nightmare creatures have a mix of behavior and resistances, but <span style="color:#ff2222;">all of them take 50% reduced damage from all sources</span></span><br /> | |||
</div> | |||
</div> | |||
Latest revision as of 11:06, 12 November 2025
A true expansion on the original
The Combat is the heart of Luna Obscura, it is designed from the start to be a strong system where players interact with the world in a much more active way.
Not only the tools players have are much more expanded vs vanilla RO, the monsters will also fight back and give you a hard time if you are not prepared for it.
Fight mechanics, monster patterns, racial variations and special situations will test everything you think you know about RO.
Not only that, but jobs have multiple tools, with their own combo counters, mechanics, stacks and so much more.
Players are expected to engage with the combat for most of their experience, and as such, its the area where the game is at its best. gone are the days of one shotting huge waves of monsters for ultra low drop rates.
Essentials: Parry and Quickstep
Every job in the game has access to Parry and Quickstep. These two skills form the bread and butter of combat.
Since Luna Obscura has no Hit/Flee, every hit will always connect, but you have tools to negate every single hit taken. Both skills also have a considerable lag tolerance to make it usable by any player.
There are enemies in the Garden of Blades called Parry Trainer and Quickstep Trainer specifically prepared to teach you how to properly use these skills, their cards also are nice rewards for it.
Quickstep

Quickstep will dash your character a few cells towards the cursor direction, no matter the distance of the cell you target.
- The hunter becomes invincible for a short window, negating any damage taken while its active.
- If the player mistimes the quickstep, it will receive glancing damage (halved damage).
- Most skills can be avoided with Quickstep, this includes physical or magic, ground targeted or directly targeted skills.
- The invincibility and glancing evasion window can be increased with higher stats.
Luna Obscura was designed in a way where players are REQUIRED to properly use quickstep. This skill is considered essential and is learned very early on.
Astral jobs have access to Lv2 Quickstep, which grants a slightly longer range and evasion window.
Finally, equipping Quickstep Signets or other items can grant unique effects, including generating resources, improving movement speed or straight up teleporting.
Parry

Parry is the higher risk defensive tool available to all hunters, it allows you to counter a single normal-attack from enemies.
- The hunter will take a countering stance when used, a cast bar will show the parry window.
- While the cast bar is displayed, taking any normal attacks will negate the hit and counter attack with a guaranteed critical hit.
- When parry is successful, it heals partial HP.
- Parry does not negate skills, instead only halving their damage.
- Parry has no range restrictions and can be used against ranged enemies without issues.
Parry also comes with 2 mechanics:
- Parrying an enemy before they start the attack will activate a regular parry.
- Parrying after an enemy begins an attack, but before the attack lands will activate a perfect parry. Perfect parries refund the SP cost.
Like Quickstep, parry is a core skill that needs to be learned to be used effectively to negate strong hits or extend your permanence in fights.
Umbral jobs have access to Lv2 Parry, which grants a slightly longer window and higher damage and HP regain.
Finally, equipping Parry Signets or other items can grant unique effects, including AoE effects, multiple hits, or negating multiple attacks at once.
Other Core Skills
The arsenal of skills for hunters also includes other notable skills, not only counting the job exclusive ones, we have skills for all hunters.
Healing
Healing is part of every hunter's kit, you have access to the free to refill Consumables: The Vials. Which can be customized and refilled for free.
- Astral Hunters have access to Solar Heal, which will heal a considerable amount of HP of a target ally.
- Umbral Hunters have access to Lunar Heal, which will heal a targeted ally over time, but with a higher amount.
- Correctly using the heal skills will also be essential in properly surviving. Signets can also change the behavior of those skills.
Other Skills
- Area Loot will manually pick-up every item on the ground, you can also just click an item and it automatically picks up everything around you.
- Dash will increase your move speed considerably when out of combat, for easier map traversal.
- Backslide is another evasive tool to quickly move out of danger or reposition, with its own glancing evasion window.
- Sense shows detailed information about monsters and their loot, they also show the monster stats and behavior expected from them.
- Return Return is learned on the first job change. It allows you to return to your save point, Nocturne or the Cathedral of Blades at anytime.
While the skills above cover the majority of it, you can also check out the visual guide at the top of the page.
Job Mechanics

Jobs in Luna Obscura have unique mechanics to them. Here we will cover some of the basics and provide some advanced examples.
While there are many variations, they will not overwhelm players in most cases, as jobs may have some mechanics here and there, but never all of them at once.
Ready Status and Combos

Combo Ready, Stab Ready, Cast Ready and so many more... all indicate that a follow-up of skills can be used for greater effect.
- Usually a starter skill grants a given Ready state.
- Other skills consume those states, or are just boosted by it considerably, creating a 1-2-3 skill flow.
- In specific cases, using a given finisher or condition will cause guaranteed critical hits or special effects to happen.
Ready states have their own signets, with extra damage effects, durations and such. Ready states are usually consumed when their conditions are satisfied (Stab Ready being an exception).
Gauges and Stacks
While the Ready status is the most common one, others may also appear sometimes:
- Orbits are counters that surround the player and indicate a given resource.
- Stacks are gained and quickly lost or spent for boosting other skills.
- Counters are anything that counts hits or indicates a flowing action.
- Gauges are direct indicators of fighting and building up a resource to be spent.
Details for all of the above and some more can be seen on the gifs below. You can hover the gifs to check the mechanic being presented in detail on the tipbox.


Changing Stances 
Stances are an extra system in Luna Obscura. Players can change their current combat priority on the fly by clicking the icon beside the Minimap.
Clicking the button will cycle the player through the 3 stances, or turn it off.
- Caster Stance Displays the cast range of skills and size of AoEs. Turns off auto attacks, targetting will prioritize enemies, reduces accidental movement clicks. Focuses on skill usage and precision.
- Warrior Stance Specific follow-up skills can be used without targetting the enemy for the next one, similar to RO's Monk combos, but with more flexibility. Note that you cannot pause combos with this mode active.
- Cleric Stance Healing, Drains, Leeches, Recovery and all else for both HP and SP will be displayed anytime it happens, shows the most information possible. By default, some healing does not show up in Luna Obscura to avoid clutter.
You can also turn off all damage display on the Equipment window's 4th tab, or change its fonts/direction of display.
What about monsters?

Sense
Shown on the image to the side, it shows all relevant aspects of a monster when used. Items and their drop rates are shown with clickable links for details so you can target farm what you prefer.
Monster stats in Luna Obscura are revamped to show the risks and effectiveness of skills they use and what to expect. Such as:
- A higher Breaker value on a monster indicates they may use more debuffs, or their debuffs are stronger.
- A monster with higher speed may use evasive skills and tactics, or attack you very fast.
- The detailed information at the end will let you know exactly what you are fighting, such as a "Large Fire Construct" or "Medium Dark Human".
- Monsters will also have different AI priorities depending on what they are. Constructs may follow strict patterns and skills, Plagues may improvise and Mythics can use impressive skills for example.
Monster Types
The key information on fighting is that enemies are not just targets you take down and move on, they will actively do their best to kill you too and can be risky even when they look harmless. Nobody expects a cursed human to randomly get back up as a zombie and keep attacking you right when you ran out of SP.
Construct
– They will employ direct combat tactics aiming to take you down with direct combat. They have unique movement interactions and may surprise you with their power and arsenal.
Constructs take 5% extra damage from Wind Element
Undead
– These use simple and effective combat methods, mostly focused on either cursing their opponent in order to make them suffer or draining their power or health.
Undeads take 5% extra damage from Fire Element
Human
– The Humans fight with tools and tactics similar to hunters, but in a crude, unrefined way. Humans will have smart and reactive battle tactics to push combat to a high risk situation.
Humans take 5% extra damage from Earth Element
Spirit
– They are supernatural beings that can cause problems to the living, they never abandoned the world after their death. They are prone to avoiding defeat or reversing a difficult situation in a pinch.
Spirits take 5% extra damage from Ghost Element
Plague
– Plagues such as rats and insects that devour the land and ravage anywhere they go. They are prone to high density or group tactics, and provide risk in numbers, and must be cleansed.
Plague takes 5% extra damage from Water Element
Beast
– Transformed monsters or ferocious nature, the Beast bring the risk of a good hunt, being the most numerous around the land, they are a constant challenge for any hunter who is not prepared.
Beasts take 5% extra damage from Neutral Element
Demon
– Demons take advantage of the weak and desperate during trying times, they are strong, imponent figures that trick, lie and manipulate people... or just slaughter them and move on.
Demons take 5% extra damage from Holy Element
Mythic
– Magical creatures from folklore, dragons, chimeras, gryphons, sea serpents and other large monsters that come from supernatural, but not spiritual paths.
Mythic takes 5% extra damage from Dark Element
Cosmic
– Creatures who cannot be fully comprehended, coming from another world or dimension, they can drive hunters insane or bring fear anywhere they come. Usually bosses or high-notoriety monsters.
Cosmic takes equal damage from any element
Nightmare
– Unspeakable Horror. Born from the depths of the darkness of the human mind and heart.
Nightmare creatures have a mix of behavior and resistances, but all of them take 50% reduced damage from all sources