A Huge Arsenal with huge options
The equipment in luna obscura provides a lot of customizing, with a wide variety of items with their own unique effects and secondary traits, it's not just going for the next tier of gear: the effects matter.
While the curve of power growth on higher levels exist, secondary effects can allow for an interesting mix and variety of effects, so you never know when you will find your dream piece of gear that instantly makes you want to make a fun build around it and every single gear piece changed has a strong impact on your character.
Note: You cannot change equipment pieces outside of Safe Zones, the only except is weapons. Plan accordingly.
Primary Equipment
Every primary equipment has a Core Bonus, that is part of every item, and their own unique effects.
Badge

Core Bonus: Stat Points
Boss Cards can only be slotted into Badges
- Badges are unique equipment that can be obtained exclusively through quests.
- There is a total of 50 Badges in the game. All Badges have a card slot.
- Badges provide a wide array of bonuses, and they are always related to how they are obtained.
- Some Badges are exclusive to Astral or Umbral jobs.
Badges for areas also add a 0.05% global chance to drop the Relic for that area from any monster in the game.
Tools

Core Bonus: Change Eye Colors
- Tools have unique bonuses that affect gameplay directly. They can be obtained in a variety of ways.
- There is a total of 18 Tools in the game. Most Tools have a card slot.
- Tools always have a complete lore information breakdown, said lore contains information and can upgrade them further.
- Eye Colors can be overwritten by wearing any middle costume.
Some basic Tools can be purchased directly on shops, others must be looted or have a complex quest for them.
As an extra detail, every tool has a small lore you can read with clues for secret rewards.
Pouch

Core Bonus: Vial Capacity
- Pouches have a specific capacity for carrying free-refil Consumables. Capacity for each pouch varies.
- There is a total of 12 Pouches in the game, always with a card slot.
- Pouches also provide specific regeneration and healing bonuses, focused on survival.
Weapon

Core Bonus: Attack and Magic Attack
- Weapons are character-bound. They cannot be dropped or farmed for, and make use of the Weapon Forms system.
- Every character has 1 weapon when apprentice and 1st job, and 4 weapons when 2nd job.
- All weapons have unique visuals.
- Higher level weapons have stronger bonuses, and ATK/MATK, but less slots for cards.
- Weapons are obtained on job change and specific quests.
Sub-Weapon

Core Bonus: Skill Bonuses
- Sub-Weapons allow characters to use higher level version of their own skills, past the usual level cap.
- They also enable special effects if the character has the skill mastered.
- If a character equips the Sub-Weapon with a bonus for a skill they don't have, they learn that skill instead.
- Most active skills in the game have an associated Sub-Weapon.
Armor
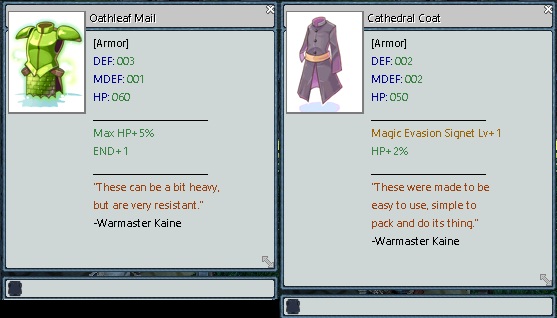
Core Bonus: Max HP
- Armors usually provide the largest amount of defensive stats and HP in the game.
- They are essential items and wearing the right armor can make the difference when tanking hits.
- Most armors have 1 card slot.
- Some Armors have effects that trigger when taking damage.
Garment

Core Bonus: Max SP
- Garments are more focused on secondary bonuses on defenses and resistances, or dodging.
- They work as coverage items, where they provide you an extra layer of defense outside your pure bulk.
- Most garments have 1 card slot.
Shoes

Core Bonus: Move Speed
- Shoes are primarily used to improve speed of actions, like attack speed, action delays, cast times and more.
- They also tend to have specific resistances and bonuses based on movement.
- Most shoes have 1 card slot.
Accessories

Core Bonus: Signets Lv+1
- Accessories provide a wide array of effects and types, and are key part in pushing a specific idea further.
- All Accessories provide at least +1 Lv in a given signet.
- Accessories can have from 0 to 4 slots. Players can equip 2 accessories at once.
Secondary Equipment
Secondary equipment have a mix of items of different types. While they usually have zero impact, some can have special effects.
Stigmatas

Core Bonus: Varies
Details about them can be checked in the Stigmatas page.
- There are 4 Stigmata Types: North, West, East and South. And they can have set bonuses.
- Stigmatas can have Arcana Cards slotted into them. Those do not stack.
- Stigmatas have a thematic and focused variety of bonuses. They can be found in every dungeon.
Legendary Item
Core Bonus: Varies
- Legendary Items are designed to be worn temporarily, depending on your intent in their use.
- Seasons always add a new iconic Legendary Item.
- They can also include accessibility tools like longer invincibility window for higher ping gameplay or challenge modes with strong penalties.
Costumes

Core Bonus: Costumes provide no stats, no exceptions.
- Costumes come in 4 types: Top, Mid, Bot and Garment costumes.
- Some unique costumes may provide special flavor, like animations, auras and overall fancy effects.
- There are over 100 costumes available.
- Some special costumes are limited to a specific job.
Special Dye
Core Bonus: Dyes provide no stats, no exceptions.
- Dyes change your character clothes or hair color while worn.
- These dyes are not consumed on use, but require you to have them equipped while worn.
- Some dyes may also provide other unique visuals, like footprints and weapon effects (pending tests).
- Other consumable Dyes also exist.
Crafted Equipment - Alchemy Gear

For players who want to have a long road of progression for gear instead of focusing only on farming directly from loot, they can work on Alchemy Gear.
While this equipment is very basic, they can be worn by anyone with good results, given their wide range of bonuses and basic properties, they are excelent "stat-stick" equipment.
They make up for it in being extremely flexible and easy to work on, provided you have the resources for it.
Alchemy Gear Details
Alchemy Gear has 2 slots.
- Alchemy Gear has very basic bonuses by default. They are the most modular equipment in Luna Obscura.
- You can use specific boxes on Alchemy Gear to reroll their random options. Basic boxes can be purchased that provide 4 rolls of stats per piece.
- You can reroll their enchantment as many times as needed. They also can receive forms like weapons, becoming Masterworked, Bloodstained and so on.
- Cost to go up in tiers is exponential, so it's very important to keep it in mind before commiting to upgrades.
Obtaining Alchemy Gear

Alchemy Gear can be crafted by using Alchemy Boxes sold in Nocturne's Cafe.
- Players can recycle 10 pieces of looted equipment into one random Worn Alchemy Gear piece.
- To go up in tiers, players need to recycle 5 of the alchemy gear of a lower tier to get one of the next tier. They will again receive a random piece.
- Alchemy Gear is tradeable. It's recommended to trade with other players to get pieces you want or exchange repeats.
- Costs for higher tiers goes up significantly when increasing tiers for smaller gains. This is by design to focus on high-end min-maxing. Not only in material required but also zeny prices.
- Some specific rare cards and enchantments are locked to specific Alchemy Gear pieces. This can unlock some general bonuses not available in other ways.
Calculations and Requirements
- Given that crafting a single piece of Worn requires 10 equipment pieces, to make a single Abyssal random item requires 625 Worn Alchemy Gear pieces or 6250 Equipment recycled.
- There are special Alchemy Crystals that can replace one piece of gear per tier going up. These can be acquired in a variety of ways.